Showing posts with label Recipe. Show all posts

Sunday

Lesson #2: The Other Meat - Pork (Chops)

One of my former students is a newly minted 2nd LT from West Point and will be on his own shortly and needs some pointers on cooking.

Since eating steak every night will eventually get old, you'll want to rotate in pork chops. Cooking pork chops is like cooking steaks, but you have to put in just a little more time.

You'll need the same flat pan as steaks: broiler pan, cookie sheet (with rim), cheap aluminum foil pan, or emergency aluminum foil boat (make sure your sides are secure to hold juices). You may also want to use a frying pan slightly larger than your chop.

Chops: at most grocery store you will see chops packaged at least four ways: center loin chops normal cut, center loin chops thick cut, quarter loin chops (which will have several different cuts), and a range of boneless "chops". I'd suggest starting with center loin chops of normal thickness, they will all be done at the same time, and will not have require as much patience as thick chops (which can lead to undercooked pork - not desirable).

This time you'll want to set your oven rack at the lowest or next to lowest position - about 8 inches from the top broiler element. A traditional pack of four chops will fit nicely on a cookie sheet or broiler pan. Or cook two and save two. Get that element hot, put a little olive oil or melted butter on the chops and salt & pepper. Try a little paprika or cayenne when you decide to get fancy.

(There are very few cases of anyone getting sick from handling raw pork, nonetheless, wash up and hand sanitize after you put it in the pan, it will keep your momma happy).

Put the pan on the low hanging rack. Set a timer for 8 minutes. When it goes off, flip them to the other side for 8 more. You might want to pick up a couple of those cheap aluminum "salad/clamshell" tongs - they are invaluable for meat flipping - no punctures, cheap, and easy to clean.

Once the timer goes off you want to pull the pan out for a sec. Set it on a hot pad or trivet - a couple of those silicone pot holders would be a good move to use as trivets - to set hot stuff on.

Move a rack to the top or next to top spot - steak position. Put the pan on there for 45 seconds to a minute - watch closely for spatter/flare. I usually leave my door cracked open to the first position, it keeps the element hot and you can see, and pull out the pan if necessary.

If you will watch and listen to the chop under the element you can actually hear the ribbons of fat along the edge of the chop sizzle or hiss as they are browning. Flip it to the other side for about 45 seconds and remove.

That should do it. You don't want it under done, though. If you stick a fork in it and the juices run clear (not bloody), it is done. (Hence, "stick a fork in me..."). If it does not run clear, move the rack to the low position and give it another 2 minutes each side. Check again. When it's done, let the meat rest at least three minutes before cutting.

Alternate method #1: Pan fry the chop in your frying pan in butter, coconut oil, or olive oil (I'm constitutionally opposed to seed oils, but I think you know that by now). Start at medium heat, and lower it a notch or two when you flip the meat. About 8-10 minutes per side should do it, put you will get spatter and a bit of smoke, so make sure you have a functioning exhaust hood if you go this way. I lay a paper plate or my fancy spatter screen on top of the chop to contain the popping oil. This plate is non-standard and ill-advised. And it works. Check the meat the same way.

Mixed (preferred): Similar to the steak method, you can sear the chop for that final minute each side in a hot buttered pan instead of on the top rack. More mess, but a little better taste.

Side dish #1: Buy applesauce, preferably unsweetened, and serve a little on the side. It's traditional. (It even comes in cups like pudding).

Side dish #2: Steamed veggies. If you'll eat carrots, try them first. It's easiest to buy "baby carrots" (it's a lie) at first, because you want them to be uniform size - so they'll cook at the same pace. (later you can learn to peel and cut them into even-sized pieces, but prepared is easier starting out). Use a regular saucepan. Put in about a 1/2-3/4 inch of water. Put in a couple/three of handfuls of carrots, so that some are sticking out of the water. Put the eye on high until the water boils, about five minutes. Stir occasionally to make sure none are sticking to the bottom. Once you are getting bubbles, lower the eye it to medium.

You want it to go another five minutes, at least. You want the water to boil away, but not completely - because the carrots will blacken/burn quickly - undesirable. So add a little water if it is about to disappear. Once you have reached 10 minutes total time, fork out a carrot and put it on a plate. Gently try to mash the carrot with the bottom of the fork. If it resists go another two minutes and try again. If it mashes easily, they are done. Once done, put them in a dish and put butter on while they are hot - it becomes a snazzy side dish. At the next level, you pour a little REAL maple syrup over the carrots with the butter and you are practically a professional.

You can steam just about any small vegetable this way. Tiny or cut up squash. Peas, brussels sprouts, asparagus, cauliflower, broccoli, etc.

Side dish, options: You can go with the salad from the steak post, or similarly heat a can of corn or green beans in the microwave for two minutes - in a microwave safe bowl.

Now that you've got the main two bachelor real meats down, we'll start getting fancy.

Saturday

Meals in the last several days

Ribs, Salad, Butternut Squash
Bacon-wrapped Chicken, Carrots, Salad
Hamburgers, Sweet Potato Fries
Steaks, Sweet Potato Chips
Pork Chops, Baked Apples
Artichoke Hearts with Hollandaise
Meatballs, Salad
Bacon & Eggs with Hollandaise and Spinach with Bacon Grease
Boston Butt, Slaw
Beef with Mushrooms & Onions
Lamb Curry with Cauliflower 'Rice'

Sunday

Bone Marrow (quite tasty)

One of the paleo things you can eat. It is so incredibly rich, that after a half dozen small pieces you are done.

The recipe I have been following is from the New York Times(!):

Recipe: Roasted Marrow Bones
Adapted from Fergus Henderson - an impressive character.

Time: 20 minutes
8 to 12 center-cut beef or veal marrow bones, 3 inches long, 3 to 4 pounds total
1 cup roughly chopped fresh parsley
2 shallots, thinly sliced
2 teaspoons capers
1 1/2 tablespoons extra virgin olive oil
2 teaspoons fresh lemon juice
Coarse sea salt to taste

At least 4 1/2-inch-thick slices of crusty bread, toasted. (Of course, we leave this part out).

1. Preheat oven to 450 degrees... to the NYTimes.


Friday

Paleo Links

I sent this in an email to a friend/co-worker who asked me about paleo eating because of my weight loss (100+ lbs) and my body recomposition.

To be a paleo evangelist, I've been slow to share more paleo info. Mea Culpa.

There are several good infographics that can serve as introduction:

The Ultimate Guide: http://pinterest.com/pin/187603140698928379/
Timeline: http://pinterest.com/pin/187603140699905232/
Bacon over bagels: http://pinterest.com/pin/187603140699898825/
Fat doesn't make us fat: http://pinterest.com/pin/187603140697640501/
Paleo/Primal Food Pyramid: http://pinterest.com/pin/187603140697507137/
PDF's from Practical Paleo: http://balancedbites.com/useful-guides

The best overall site for info is: Mark's Daily Apple http://www.marksdailyapple.com. He's got a lot of stuff to sell - I've bought a couple of his books, but the info is free. He calls his stuff Primal, rather than Paleo, because it's his brand.

http://www.marksdailyapple.com/primal-blueprint-101/ is the place to start.

There are few people who do a better job with the actual recipes:
Nom Nom Paleo is one of the top paleo food websites: http://nomnompaleo.com/recipeindex

I am currently using Diane Sanfilippo's recipes and I like them the best, so far. Her brand is 'Practical Paleo' and her FAQ is here: http://balancedbites.com/2013/03/faqs-what-is-paleo.html
and the book at Amazon - Practical Paleo.

Sarah Fragoso's recipes are also quite good and her brand is Everyday Paleo http://everydaypaleo.com/food/. I like her book as well, and it has some exercise basics - Everyday Paleo at Amazon.

The hardcore people - Dallas & Melissa Hartwig - and how I lost another 20 pounds in August - and their brand is The Whole 30: http://whole9life.com/2012/08/the-whole30-program/ and
their book is 'It Starts with Food'.

and finally a list of 25 top paleo websites from Nom Nom Paleo: http://nomnompaleo.com/resources

Yours,
Mike Ray


Sunday

Paleo Curry

2 pounds meat
1 bag of frozen cauliflower
3-5 tbsp of Curry powder - we use Madras or Sweet Curry
1 can (12.5 oz?) of organic tomato sauce
2 tbsp of a paleo cooking fat
1 medium onion
2 cloves of garlic
optional carrots or parsnips
salt
black pepper

- I prepare the bag of frozen cauliflower according to the microwave directions and set aside in a separate bowl (reduces vitamin breakdown).
- Crush the cauliflower with a potato masher or large fork until it has a rice-like consistency.
- In a fryer (a steep-sided 12" frying pan) or Dutch oven I begin by heating the fat on medium heat - I have used coconut oil, olive oil, pasture-raised lard, and ghee for this (about 2 tbsp).
- I cut the meat into even chunks, about half-inch cubes. I have used chicken, pork, lamb, and beef. About 2 pounds.
- Brown the meat on all sides and remove it to a bowl.
- As the remaining liquid cooks reduces to almost only oil, I add the chopped medium onion and occasionally a few chopped carrots or parsnips (even sized pieces) and cook them for about 6 minutes, scraping the bottom and mixing it with the vegetables. Then add the 2 cloves of pressed garlic for an additional 2 minutes and stir.
- Reduce the temperature to medium-low.
- Add the cauliflower to the pan and then mix in 2 tbsp of Madras (Indian) Curry Powder, coating everything.
- Stir in one large can of organic (Muir Glen) tomato paste. Mix well.
- Stir in the meat and another tbsp of curry powder.
- Lower to a simmer and season with salt and pepper and additional curry powder to your taste.
- The longer you can let it simmer the better, but stir to avoid scorching the sauce on the bottom.

The cauliflower gives the dish the rice consistency that is otherwise missing from many paleo curry dishes. It imparts little taste, but gives you its health benefits.

We ate this at least 4 times during our Whole 30, making it a little differently each time.

Monday

Albondigas (Meatball) Soup from Everyday Paleo

The Everyday Paleo book by Sarah Fragoso a great resource for Paleo Recipes and beginning workout information. It may seem a little domestic for hip paleo people, but we should get over that - it is quite useful.

We used her recipe for Albondigas (Meatball) Soup last night. It was excellent. Chili seasonings with a cabbage and meatball soup. It tastes outstanding.

The recipe is also available on her blog. You can find many other excellent recipes there.


Boston Butt in the Oven

I try different prep methods but the most recent success has involved:

3-4 pound Boston Butt

Immerse in cider vinegar and water for 30 minutes.
Pat dry.
Cover with 3 tbsp of salt and 1 tsp of raw sugar and let rest for at least half an hour.

Place in a 250 degree oven for 6 hours.

After 3 hours begin basting the butt every half hour with the juices in the pan.

When done, remove and let rest for 30 minutes.

Pull apart with forks.

I remove some of the remaining connective/fatty internal pieces, but break up the browned external fat with the meat.

I usually combine 2 tbsp of cider vinegar and 1 tsp of cayenne with the meat as I finish pulling it.

I drew on David Chang's article in Lucky Peach for this recipe.


Chicken Wings?

 Wings:
Separated into flats & drums.
Coconut Oil melted in a bowl.
Wings dipped in the bowl and arranged on a cookie sheet.
Broiler on High, Cookie Sheet placed on the 2nd lowest rack.
Broil 18 minutes, turn wings over.
Broil 18 more minutes on other side.
Place rack at highest position.
Broil 1 minute on each side.

Sauce:
6 oz. of Texas Pete Hot Sauce
4 oz. of Ghee (or Kerrygold Butter)
Heated and stirred together. 

Immediately after wings are taken out, dip them in the sauce and plate.

Serve with celery and blue cheese (recipe for another day).   


Sunday

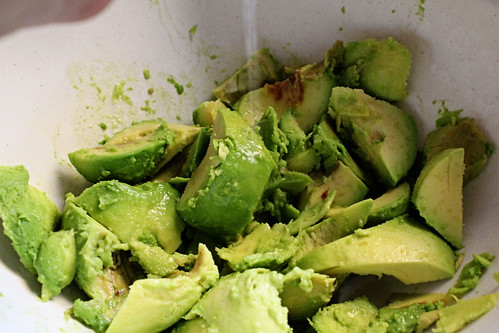
My Guacamole

2 Avocados
1 Lime
1 Roma Tomato
1 Small Onion
1/8 tsp Chili Powder

1) Chop the avocados coarsely
2) Squeeze the juice of half a lime over them
3) Chop the tomato, add it in
4) Chop the onion, use only about 1/4 of a cup, add it in
5) Add the chili powder
6) Stir it together, squeeze the other half of the lime over it and mash it a bit.

Excellent with bacon!

Paleo Muffins

Not having bread-like food after a lifetime of eating it can be difficult.
We worked on this biscuit recipe from Food Renegade a little and got something we both enjoyed.

Paleo Muffins
- 1 cup almond flour/meal (overflowing)
- 4 egg whites (we use jumbo eggs)
- 1/3 cup grass-fed butter (Kerrygold) = 5 & 1/3 tablespoons
- 1 teaspoon baking powder
- 1/2 teaspoon salt

1. Preheat oven to 350.
2. Beat egg whites with a hand mixer until they were frothy (less than a minute)
3. Cut the butter into pea-sized pieces and combine with the almond meal until pieces of butter are covered in meal.
4. Add egg whites, baking powder and salt to butter/flour, then mix with hand mixer until the flour has combined with egg whites (less than a minute)
4. Butter a six-muffin tin and distribute batter equally.
5. Bake 15 minutes (until toothpick goes in and out cleanly).
6. Let cool for at least five minutes.
7. If necessary, use the edge of a butter knife to gently separate muffins from tin.

We have used these with bacon and eggs and also for orange marmalade. Delicious.